preamble
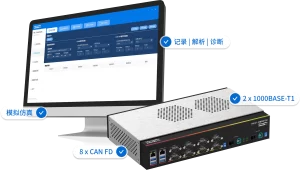
In complex CAN bus systems, engineers are often faced with the problem of recording and managing large amounts of data. Especially when recording a large amount of data, the traditional method of extracting the data at one time and then dividing the logs is not only time-consuming, but also may bring a heavy processing burden to the PC. To solve this problem, Kvaser Logger supports the trigger function.Allows users to automatically split log files to accurately capture key events by personalizing the trigger settings.The company's goal is to optimize storage resources and streamline the process of post-processing analysis.
This article, written by Kvaser Field Application Engineer Adam Raymer, is intended to provide a detailed overview of how to utilize the triggers feature of the Kvaser Memorator,...Helps engineers more effectively cope with the challenges of massive amounts of newspaper data.。
*This example will highlight how to use the Trigger feature on Memorator Pro. The basic triggers feature is also available on Kvaser Memorator 2xHS v2, Kvaser Memorator Pro 2xHS v2 and Kvaser Memorator Pro 5xHS.

Figure 1. Memorator Pro Trigger Features Overview
Preparation
1️⃣ Open the Kvaser Memorator Configuration Tool from the System Start menu.
2️⃣ Select and connect your Memorator device.
3️⃣ Synchronize the Memorator clock with the system clock if necessary.
4️⃣ Perform maintenance operations such as tile initialization or formatting.

Figure 2. Open the Configuration Tool and connect the device.
Configuring Triggers
1️⃣ On the left menu of the Kvaser Memorator Configuration Tool, locate and enter the “Log configuration” option.
2️⃣ Uncheck the “Log Everything - the triggers are disregarded but the filters are still used” checkbox. (If this checkbox is checked, the triggers will not work; they are checked by default, so you need to uncheck them manually.)

Figure 3: Log configuration options

Figure 4. Click Add in the 'Triggers' directory to create a trigger.
1️⃣ In the “Triggers” directory, click “Add” to create a new trigger.

Figure 5. Naming and configuring the first trigger.
2️⃣ Name the Trigger: In this example, we name the trigger “PowerOn”.
3️⃣ Select the default channel.
4️⃣ Setting protocol: can be set to “None” (raw CAN data) or “J1939” (J1939 format).
5️⃣ Enter the “define what the trigger reacts on” interface.
")
Figure 6. Defining Trigger Events (PowerOn)
6️⃣ Define trigger events: For the PowerOn triggers, we choose to trigger on “Trigger on special events”.

Figure 7. Completing the first trigger setting.
7️⃣ Select “Start up” as the special event trigger condition, click “OK”, and then press “Next”.

Figure 8. Check and complete the first trigger setting.
8️⃣ Check the triggers settings, if it is correct, press “Finish” to finish creating the first trigger.
Creating a second trigger
")
Figure 9. Creating the second trigger (start)
1️⃣ Same as above, create a second trigger (named “Periodic” for 2-minute timer) and press “Next”.

Figure 10: Select Timer Event
2️⃣ Select “Timer Event” as the trigger event.
")
Figure 11: Setting the timer (120 seconds)
3️⃣ Set the timer to 120 seconds and check the “Activate the timer cyclic” checkbox to activate the timer cyclic.

Figure 12. Setting Trigger Timeout
4️⃣ In the “Set trigger timeout” screen, set the trigger to run but not to stay activated (i.e., the timer starts once and stops immediately so that it can be triggered again), and press “Next” to continue.

Figure 13: Completing the Second Trigger Setting
5️⃣ Press “Finish” to finish setting the second trigger.
How to make two triggers work together?
Now we have two triggers, PowerOn and Periodic.These two triggers work in tandem to enable the Memorator to automatically switch between logging states for seamless log splitting.。

Figure 14: Creating Operational Synergies
1️⃣ Create an equation to explain the relationship between triggers. In the “1st Expression” field, type (PowerOn|Periodic) and the action will be StartLogging.
2️⃣ After the trigger, the Post trigger will tell the system to stop recording after 119000 milliseconds (119 seconds), which needs to be slightly shorter than the Timer Event trigger.
3️⃣ When connected to the power supply, the PowerOn trigger records immediately and the Periodic trigger starts counting down; after 119 seconds of recording, the Post trigger stops recording, and the Periodic trigger restarts one second later, forming a cycle.
How to adjust the time interval?

Figure 15: Adjusting Time Interval
When different time intervals are needed, you can change the timing of the Timer Event triggers and Post triggers. Note that the unit of Timer Event is second and the unit of Post Trigger is millisecond.For example, if a small time interval is required, set the Timer Event to 3600 seconds and the Post Trigger to 3,599,000 milliseconds.(One second less than Timer Event. (One second less than Timer Event.)
When all settings are complete, download the configuration to Memorator, which will log for two minutes, then stop logging, create a new log entry, and start logging again. When extracting data, you will be presented with multiple log files, each about five minutes long, allowing you to select a specific time period for extraction without having to process the data for the entire session.
The disadvantage of this method is that there is a delay of about 1 second between the log stopping and restarting, during which time the data cannot be recorded. This is of particular concern in scenarios where data integrity is critical; however, even with the short delay, the method is well suited for applications that handle large amounts of data and simplify the log extraction process.
Product Recommendation

Kvaser Memorator Pro 2xHS v2
- Efficient Recording: Supports massive CAN data recording and automatic segmentation.
- Intelligent Trigger: Trigger function for precise capture of critical events.
- Easy to Operate: Automated journal splitting can be achieved through simple configuration.

AKvaser Memorator Pro 5xHS
- Extra Large Capacity: For larger CAN network logging.
- Multi-trigger: Supports multiple trigger settings to meet complex application requirements.
- Flexible Configuration: Users can customize the segmentation conditions and time intervals according to their needs.